


A4 Paper Tutorial :D
+8
kaitozenders
Angelica
ηαтнz
nosyaj
wellboy
x.x nHicOle16 x.x
jace_hayley
katexdii`09
12 posters
:: Graphics Section :: PS Tutorials
Page 1 of 1

A4 Paper Tutorial :D
![]() by katexdii`09 Sun Apr 19, 2009 3:58 pm
by katexdii`09 Sun Apr 19, 2009 3:58 pm
I'm using Photoshop CS3
1. Open up a new document 600x600 pixels.
2. Create a new layer and fill it with white.
3. Go to Layer > Layer Style > Blending Options (or double-click the layer). Use these settings:

4. Create a new layer. Select the Rectangular Marquee Tool and use these settings:

(This is the ratio of an a4 paper, if you'd like to create a different shape use style: normal)
5. Make a selection like this:
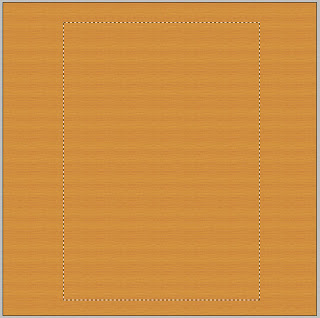
6. Fill the selection with #f8f8f8
7. Now we're going to add some texture to the paper. Go to Filter > Noise > Add Noise and use the following settings:

8. Layer > Layer Style > Blending Options:


9. 9. Change the opacity of the layer to 90-95%. You're done!
This is my final image (I just duplicated and rotated the layer):

1. Open up a new document 600x600 pixels.
2. Create a new layer and fill it with white.
3. Go to Layer > Layer Style > Blending Options (or double-click the layer). Use these settings:
4. Create a new layer. Select the Rectangular Marquee Tool and use these settings:
(This is the ratio of an a4 paper, if you'd like to create a different shape use style: normal)
5. Make a selection like this:
6. Fill the selection with #f8f8f8
7. Now we're going to add some texture to the paper. Go to Filter > Noise > Add Noise and use the following settings:
8. Layer > Layer Style > Blending Options:
9. 9. Change the opacity of the layer to 90-95%. You're done!
This is my final image (I just duplicated and rotated the layer):

katexdii`09- FT Obsessed


jace_hayley- FT Freshman

Re: A4 Paper Tutorial :D
![]() by x.x nHicOle16 x.x Sun Apr 26, 2009 10:28 pm
by x.x nHicOle16 x.x Sun Apr 26, 2009 10:28 pm
woow! Tnx for this tita khate!

x.x nHicOle16 x.x- FT Freshman
Re: A4 Paper Tutorial :D
![]() by wellboy Wed Apr 29, 2009 2:56 pm
by wellboy Wed Apr 29, 2009 2:56 pm
wow. . .
this is nice. . .
thanks for sharing mate. . .
this is nice. . .
thanks for sharing mate. . .

wellboy- FT Freshman


Angelica- FT Master


kaitozenders- FT Senior


merzloverz- Mr.Heartthrob


kennicenerea- FT Official


reesewanayn
» Tutorial on how Sossy High will appear on your group
» Secrets of Retouching Photos - Whiten Teeth(video tutorial)
» Secrets of Retouching Photos - Whiten Teeth(video tutorial)
:: Graphics Section :: PS Tutorials
Page 1 of 1
Permissions in this forum:
You cannot reply to topics in this forum